How to Organize Projects for Maximum Efficiency
Workspaces, folders and stages — three levels of structure, and knowing which to use for what.
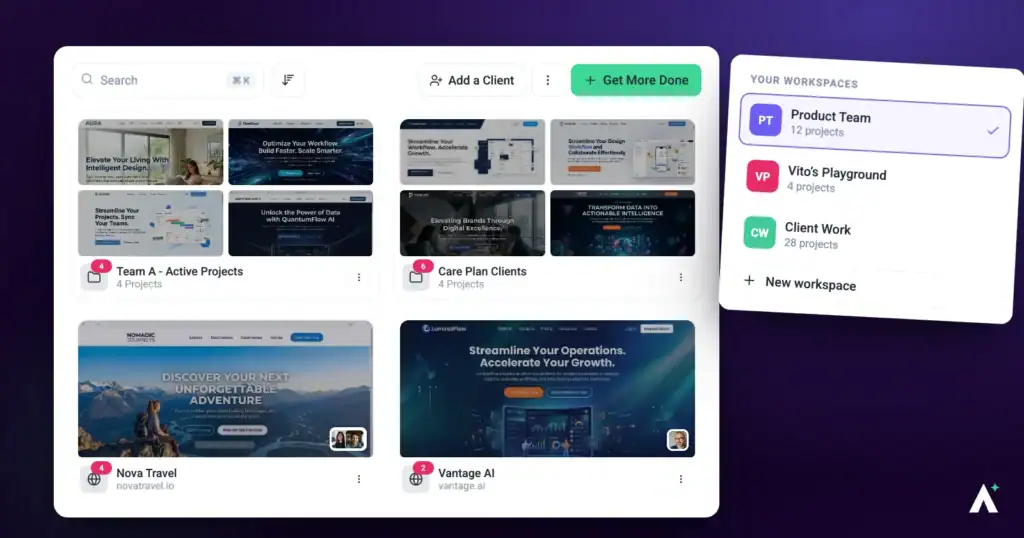
Atarim gives you three levels of structure, and most disorganisation comes from using the wrong one. Workspaces separate, folders group, stages sequence.
Structure decided early is far cheaper than structure retrofitted.
| Level | What it does | Use it when |
|---|---|---|
| Workspace | Complete separation — projects, email inboxes, integrations, tasks and user access are all siloed. | Different brands, clients or departments that shouldn’t see each other’s work. |
| Folder | Groups projects within a workspace, with team access assigned at folder level. | Related projects for one client or objective. |
| Project stage | Sequences the work inside a project. | Showing which phase something is in. |
1. Set Up Workspaces
Workspaces separate things entirely. Anything that only needs grouping is better handled by a folder.
Instructions:
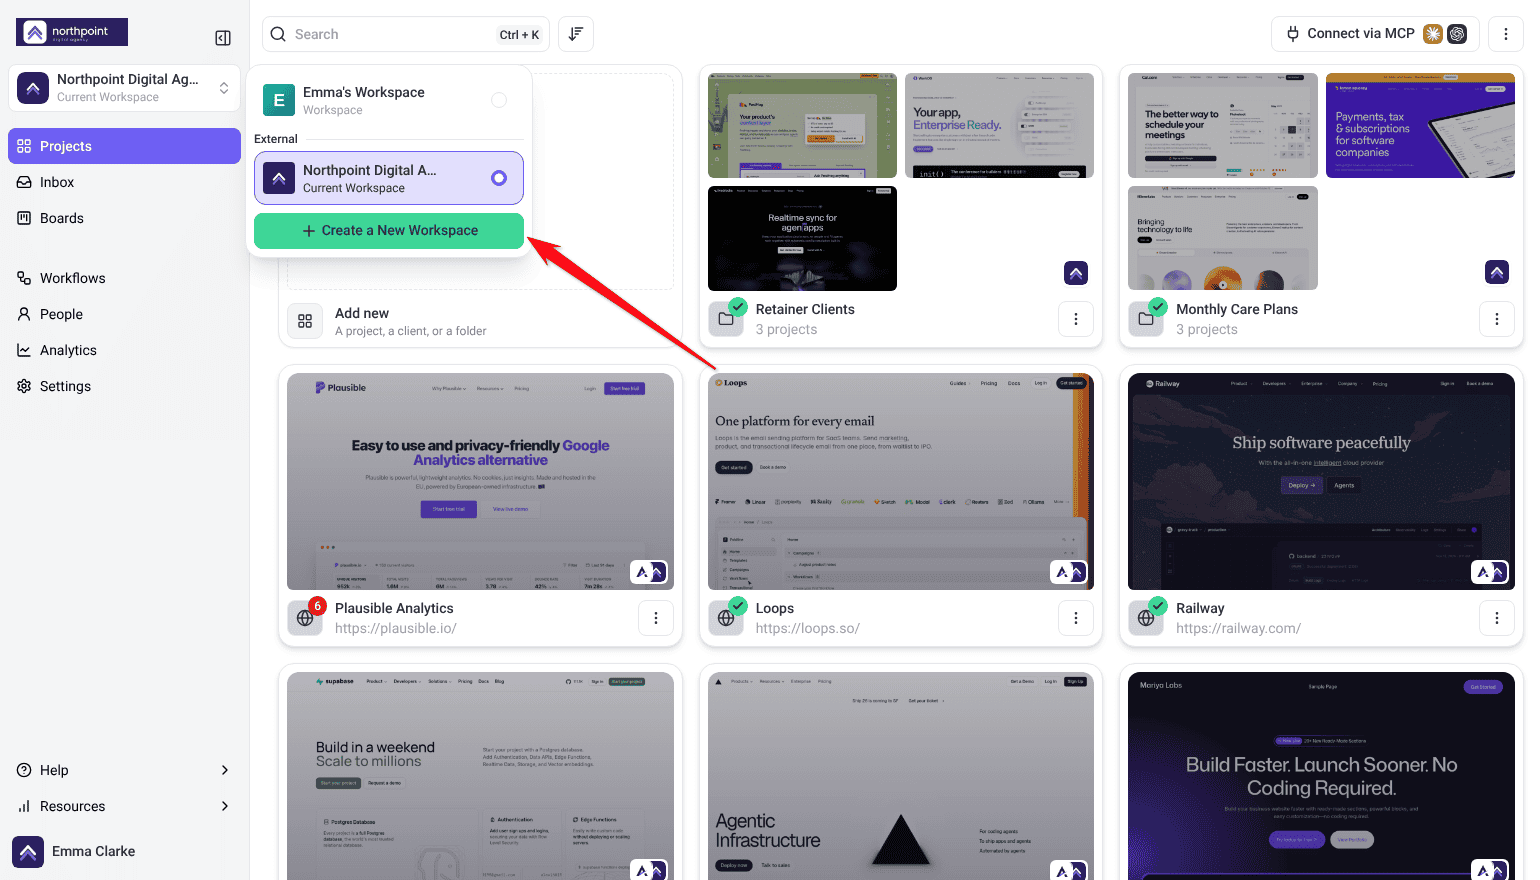
- Open the workspace switcher at the top of the sidebar and select Create a New Workspace, or go to Settings › Workspaces and select Add Workspace. Extra workspaces are a paid feature.
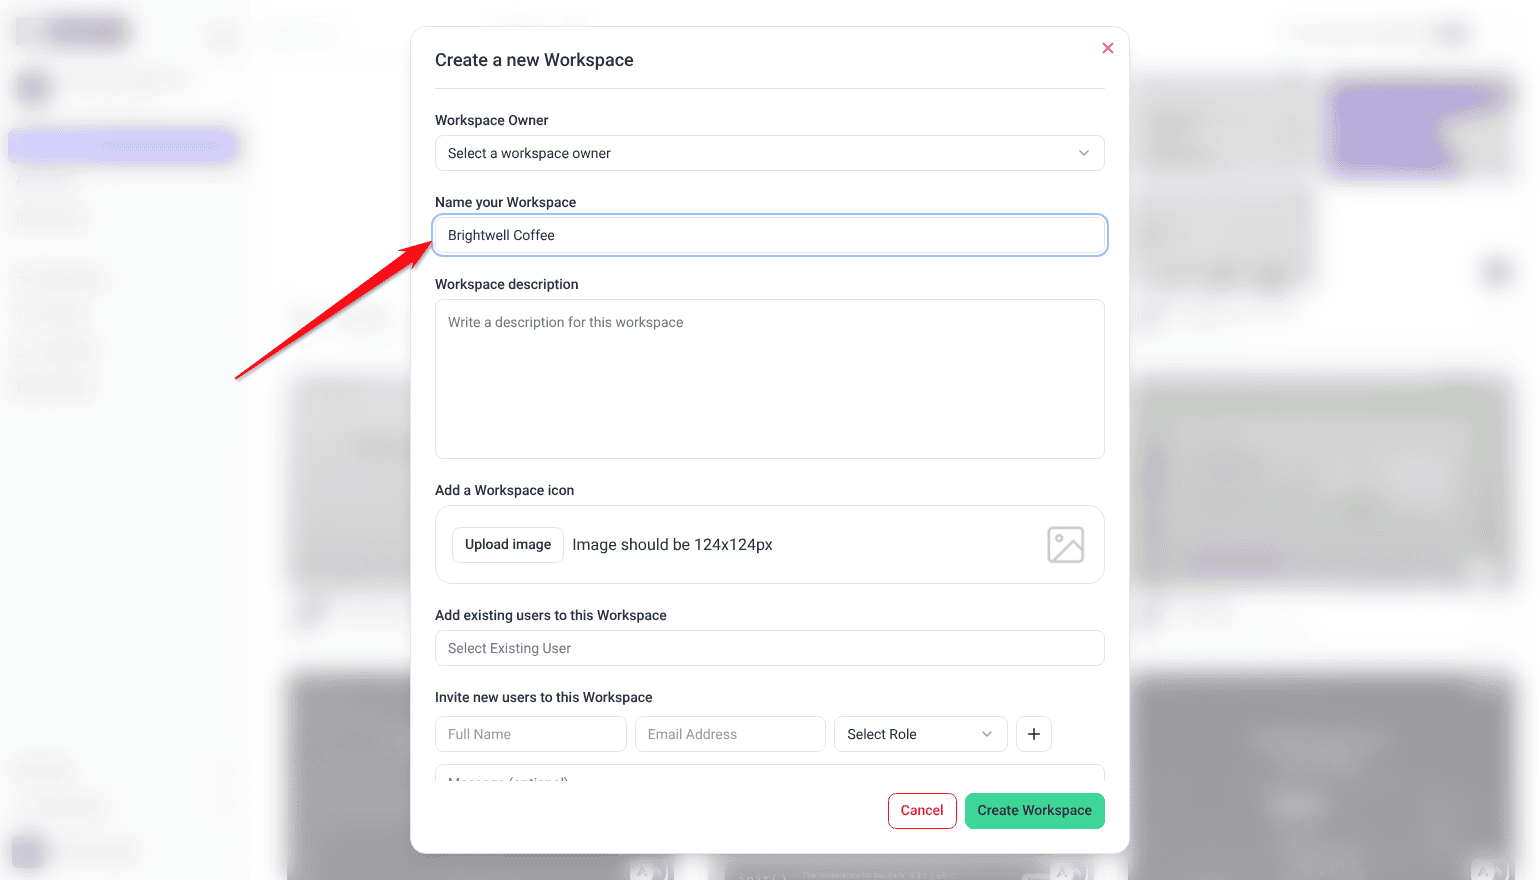
- Name it, then assign team members and set their roles.
- Add an icon if you want it recognisable at a glance.

2. Work the Projects Screen
Projects can arrive four ways: by URL, through the WordPress plugin, as uploaded designs or PDFs, or from Figma. All of them land in the same grid.
Instructions:
- Open the Projects screen from the main dashboard.
- Select Add new and choose how to add the project: Drop a URL, Manage a WordPress site, Upload designs or PDFs or Connect to Figma.
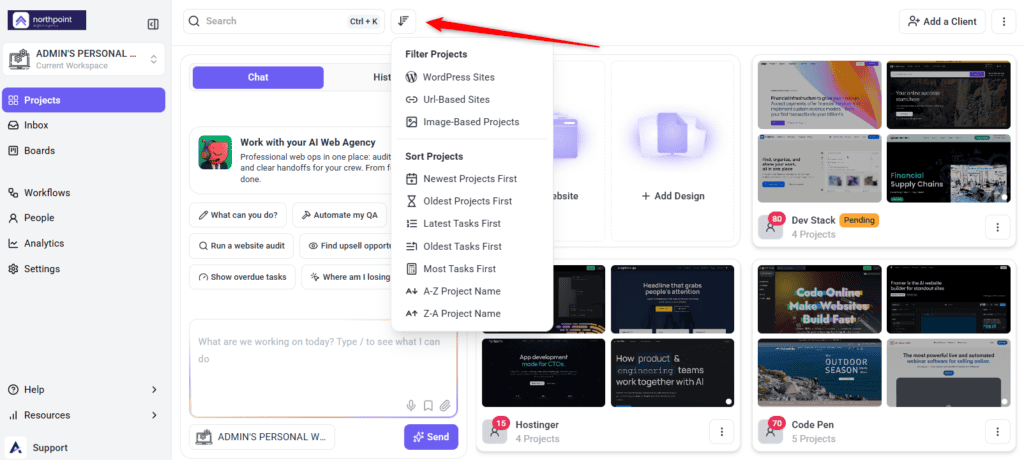
- Use filters and sorting to narrow what you’re looking at.
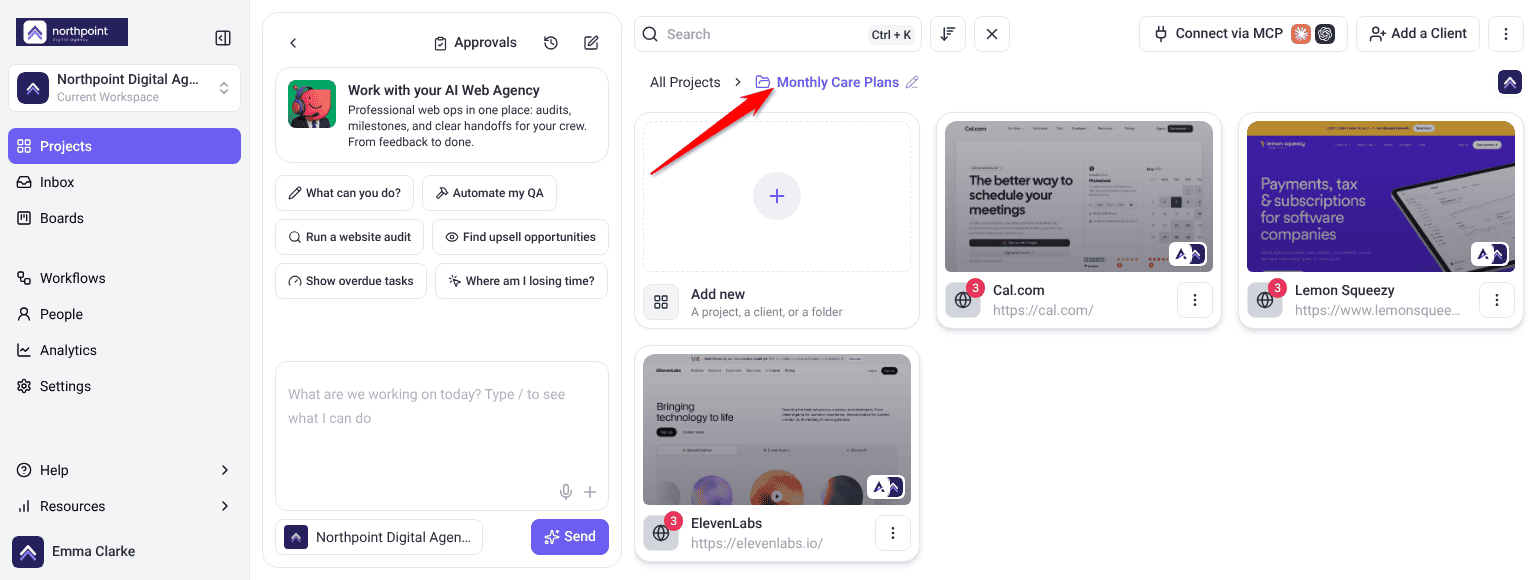
3. Group Projects into Folders
There are two ways to create a folder, and the quicker one depends on what you’re doing. By default, only workspace owners and administrators can create folders and change their settings.
Instructions:
- Drag one project onto another to create a folder around them both — fastest when you spot two that belong together.
- Or create the folder directly, giving it a Folder Name, then using Assign Projects to Folder and Assign Team Members. Better when you’re setting up several projects at once.
- Use folder settings later to rename it or adjust permissions.

4. Use Project Stages for Timelines
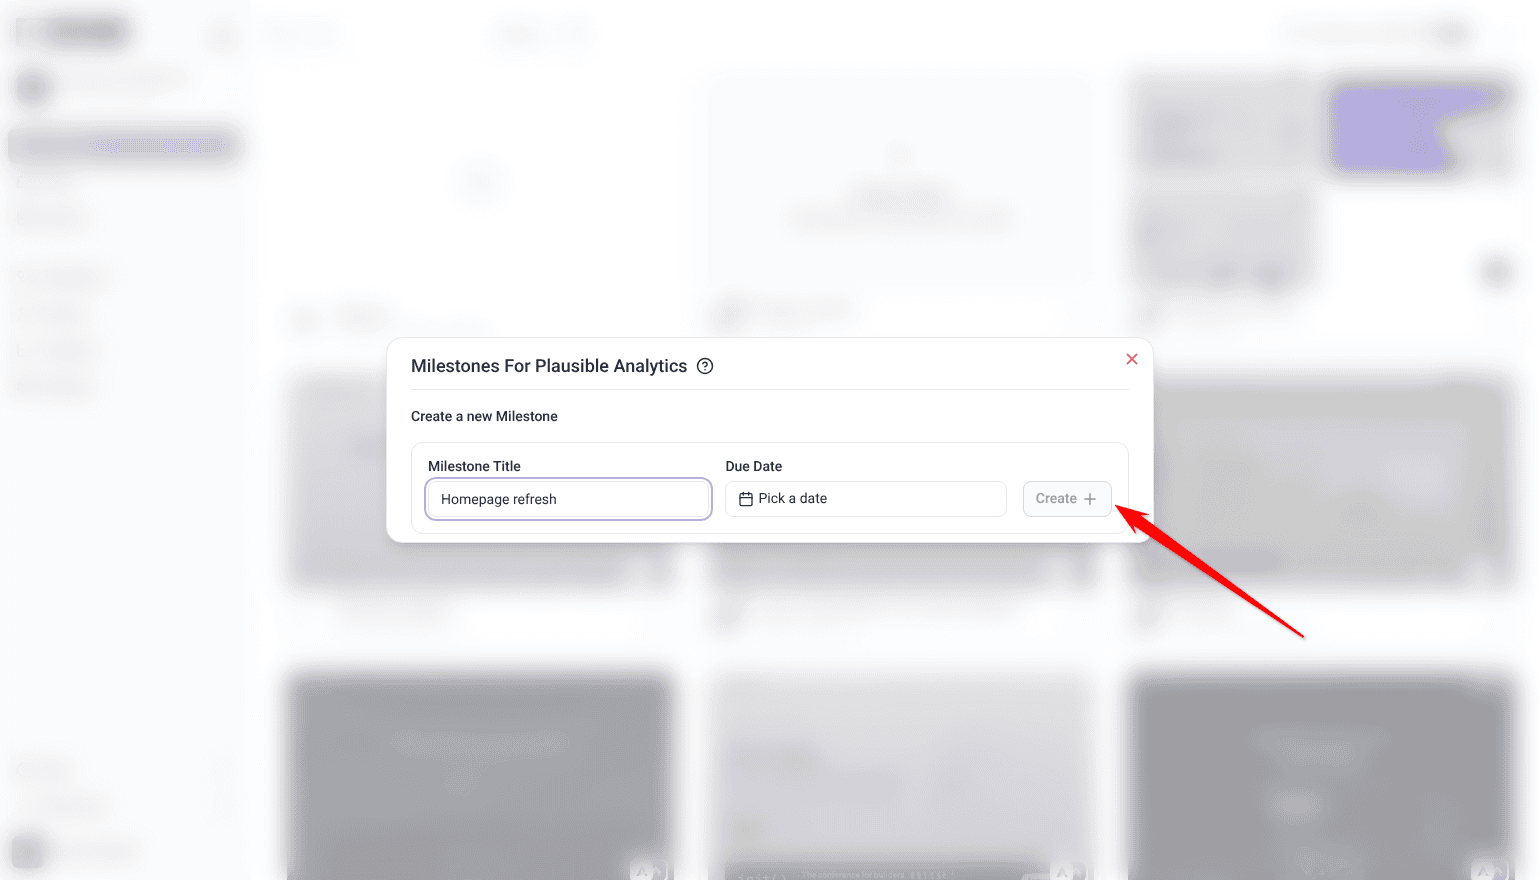
- On the Projects screen, open the project’s ⋮ menu and select Set Project Stages.
- Under Create a new Milestone, enter a Milestone Title for each stage your work actually runs through, such as Design Review and Final Approval.
- Set a Due Date, then select Create.
- Share the stages with clients for transparency.
- When a stage is finished, select the clock icon beside it (Mark milestone as complete).
Project stages are a paid feature, and Team Members don’t see Set Project Stages by default.

5. Archive Rather Than Delete
- Archive projects that are inactive but might come back.
- Delete only when a project is genuinely finished with.

FAQs
Can I move projects between folders?
Yes. Unassign the project from one folder, then assign it to another.
What happens if I delete a project?
It’s removed along with its tasks, and you can’t restore it yourself. Archive instead if there’s any chance you’ll want it.
How do I share a folder with my team?
Assign team members at folder level — everything inside becomes accessible automatically.
Workspace or folder?
Workspaces silo everything, including inboxes and integrations. Folders group projects within a workspace. Use a folder unless you genuinely need separation.
Do archived projects count against my quota?
No. That’s what makes archiving the better option when you’re near your limit.
How do I create a folder?
Drag one project onto another, or create the folder directly and assign projects and team members to it.
Common issues
- A colleague can’t see a project — check folder assignment. Access is granted at folder level.
- You’ve hit your project limit — archive inactive projects. Archived ones don’t count against the quota.
- You deleted something you needed — you can’t restore it yourself. Contact support, but recovery isn’t guaranteed.
- Only one Projects layout is available — List View is a plan feature. The lock names the minimum plan required.
- Too many workspaces to manage — use folders instead where full separation isn’t needed.
- Clients ask where things stand — share project stages, and tell them directly when a stage changes.
Conclusion
Workspaces separate, folders group, stages sequence. Most organisational trouble comes from using a workspace where a folder would do, which means reconfiguring inboxes and integrations for no real gain.
Assign access at folder level, archive rather than delete, and revisit the structure as the portfolio grows. Discover Managing Multiple Projects Efficiently
Tips & best practices
- Use folders before workspaces unless you need full separation.
- Assign team access at folder level rather than per project.
- Archive completed projects to keep the dashboard clear and free slots.
- Never delete when archiving would do.
- Use boards for the overview and the Inbox for detailed task work.
- Revisit your structure as the portfolio grows.