Navigating the Atarim Dashboard
Every item in the sidebar — what it is and where to go for more.

The sidebar is your control center. A workspace switcher sits at the top, then seven navigation items grouped into two blocks, then help and support links at the bottom. Your agency's own identity — or Atarim's, if you haven't white labeled — anchors the very bottom of the panel.
What you actually see depends on your role and permissions. Several items are hidden entirely rather than greyed out, which is the most common reason a new starter can't find something a colleague told them about.
In this guide you'll learn what each item does and which article to read for the full depth on any one of them.
| Item | What it’s for | Who sees it |
|---|---|---|
| Projects | Your landing view — Claro’s chat panel (Beta) beside the projects grid | Most roles |
| Inbox | Every task across your projects, including emails from the shared Email Inbox | Most roles |
| Boards | Kanban view of your tasks for one project or all projects, grouped by status or priority | Most roles |
| Workflows | Automations — triggers, actions and branching | Not Team Member |
| People | Everyone in the workspace, with roles and access | Admin only |
| Analytics | Workspace-wide activity and AI performance metrics | Not Team Member |
| Settings | Everything that applies across the whole workspace | Admin only |
Step-by-Step Guide
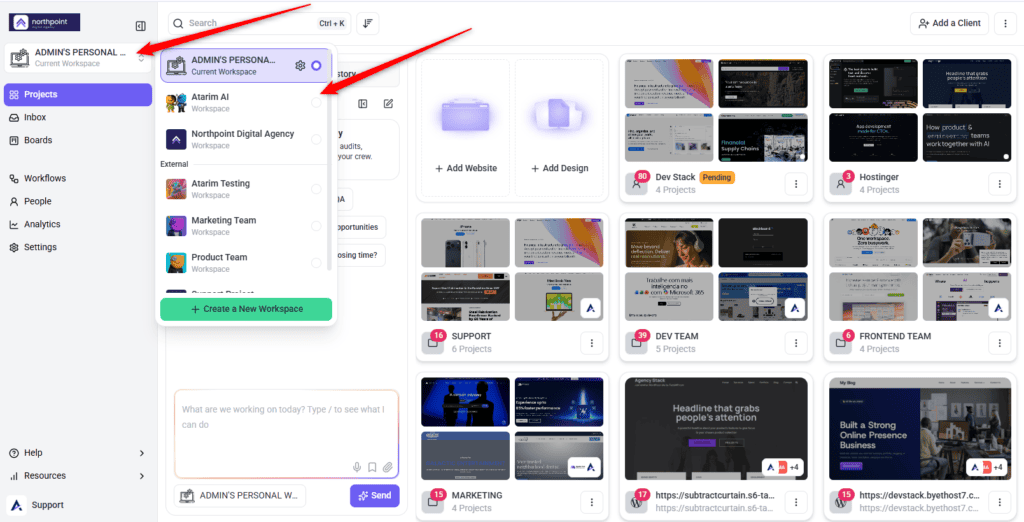
Step 1: Switching Workspaces
The switcher sits above everything else in the sidebar and shows the workspace you’re currently in.
Instructions:
- Select the workspace name at the top of the sidebar.
- Choose a different workspace from the list.
- The whole screen reloads, scoped to that workspace’s own projects, team, and settings.
Step 2: Projects
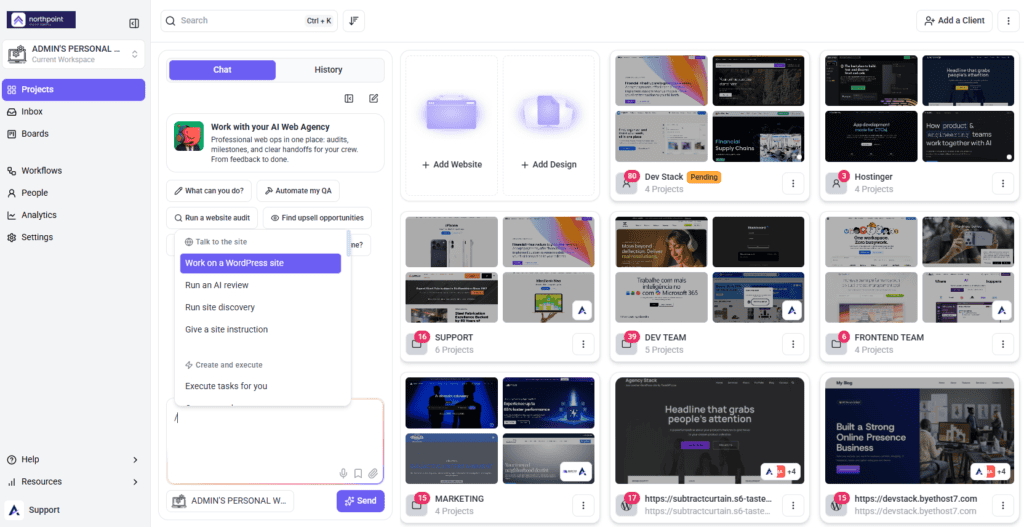
The default landing view when you log in, and where most people spend their time — the Atarim logo brings you back here from anywhere. Claro’s chat panel sits alongside the projects grid, with quick-start prompts above the composer and / to open the slash-command menu. Explore Projects Screen Overview
Step 3: Inbox
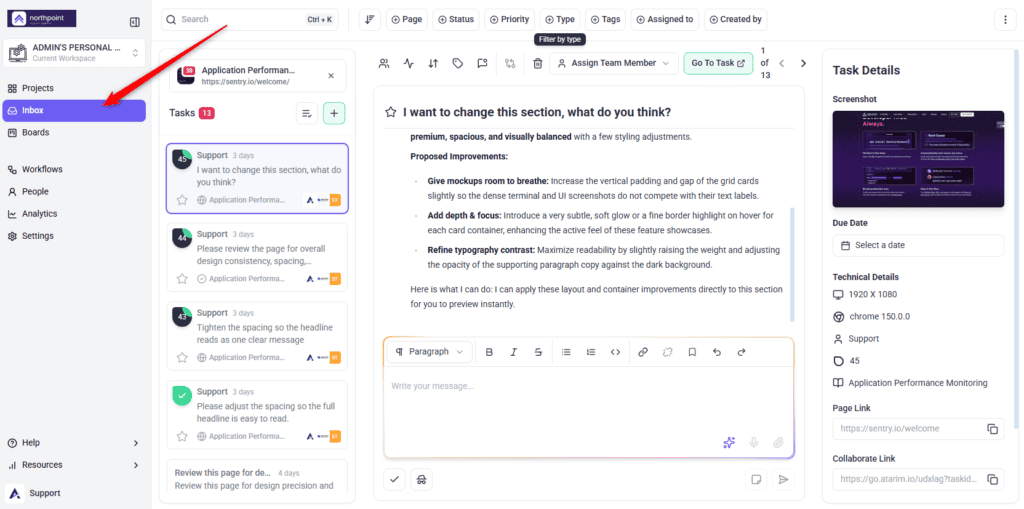
Lists every task across your projects in one place, including emails that arrive through the shared Email Inbox, so nothing ends up tracked in two places. If new emails haven’t shown up yet, choose Email Inbox in the project picker and use the refresh button above the task list. Explore How to Manage Tasks in Atarim, and for emails, Learn More About Handling Emailed Requests Day to Day
Step 4: Boards
A Kanban view of your tasks, for one project or all projects at once, grouped in columns by status or by priority. Discover How To Use Boards Effectively.
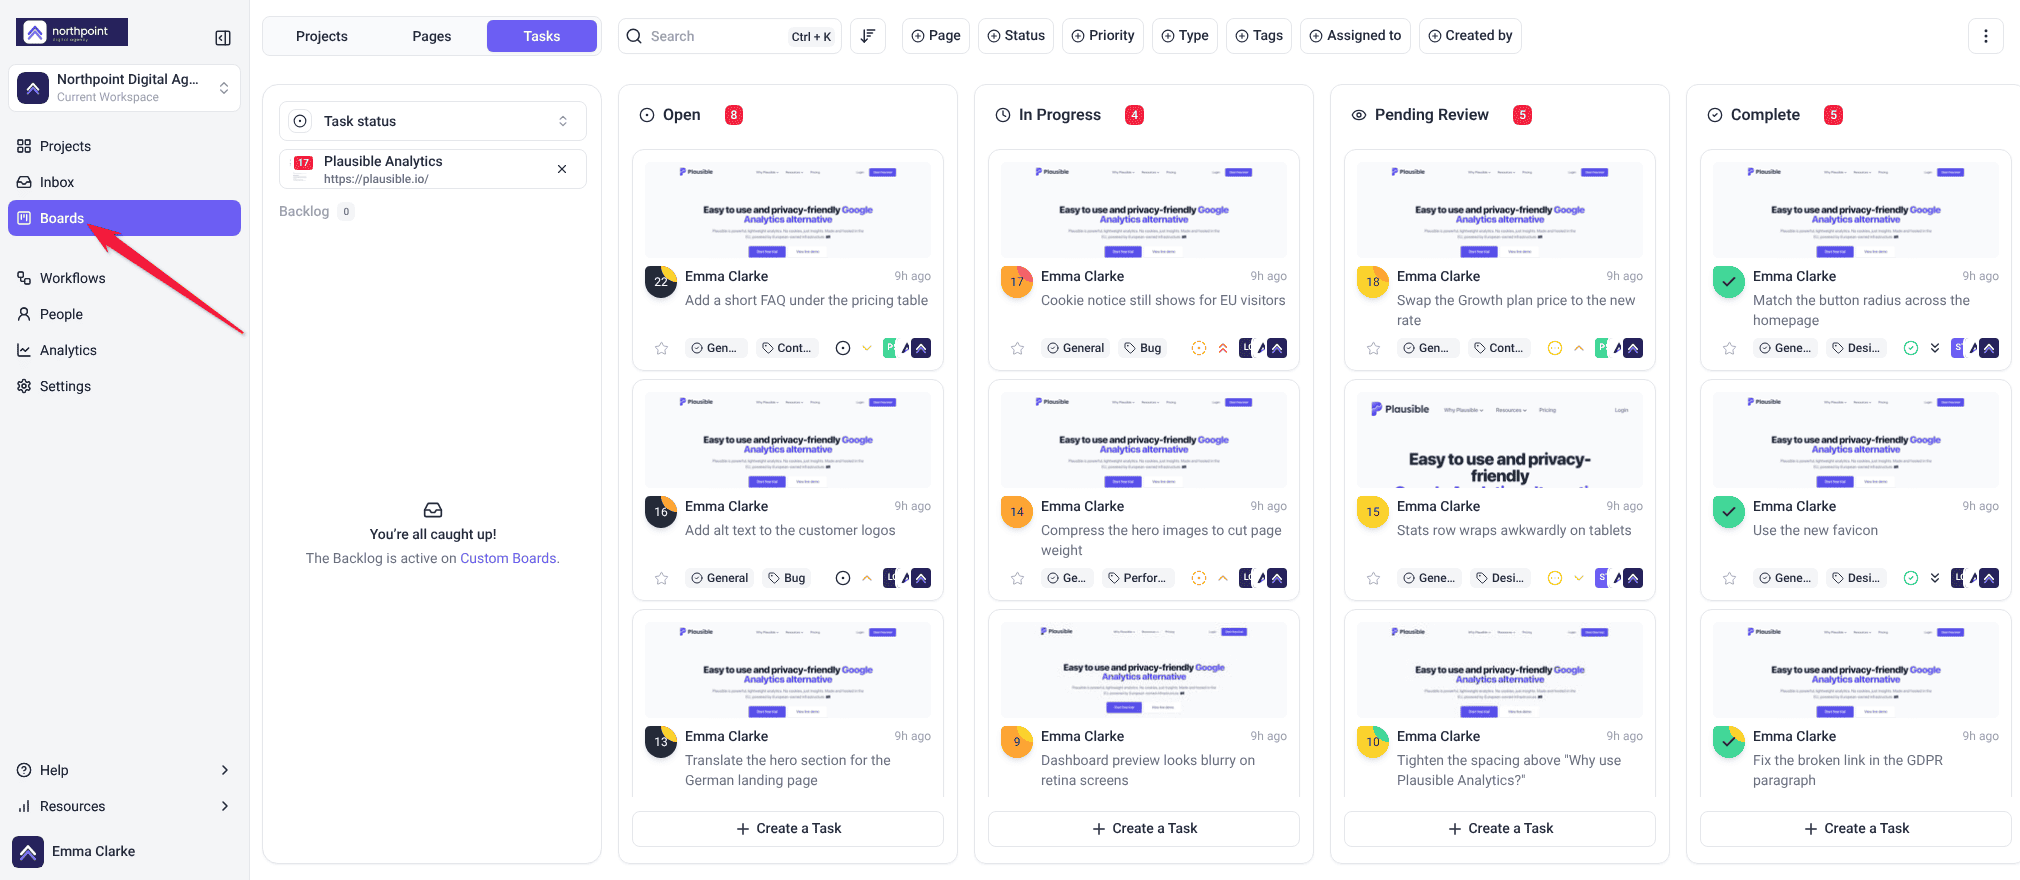
Drag Cards Between Columns to Change Status
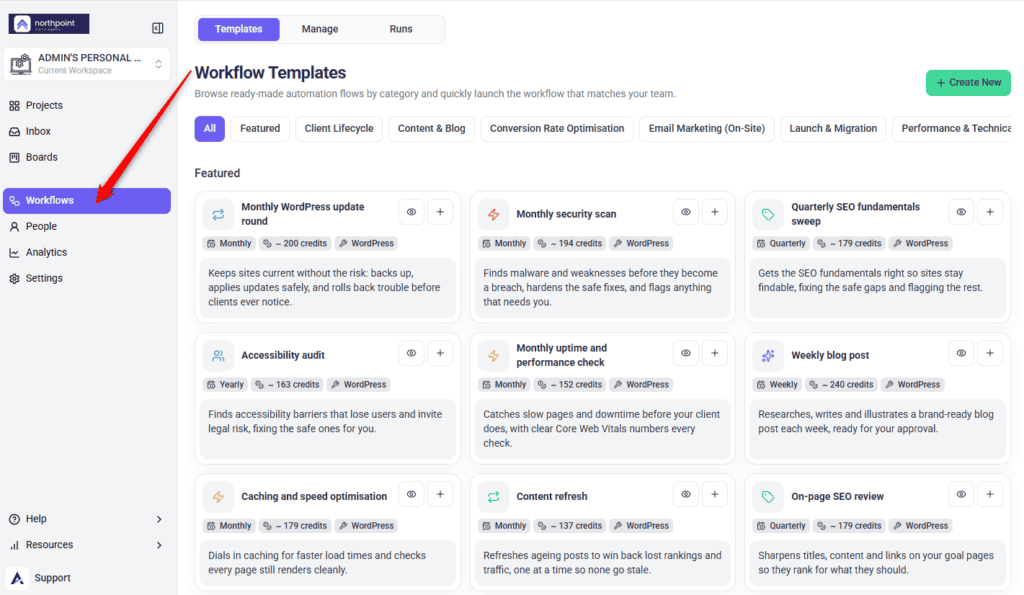
Step 5: Workflows
Automations that fire on a schedule or in response to something happening — assigning tasks, updating statuses, sending notifications, running AI actions. Explore Workflow (Automation)
Step 6: People
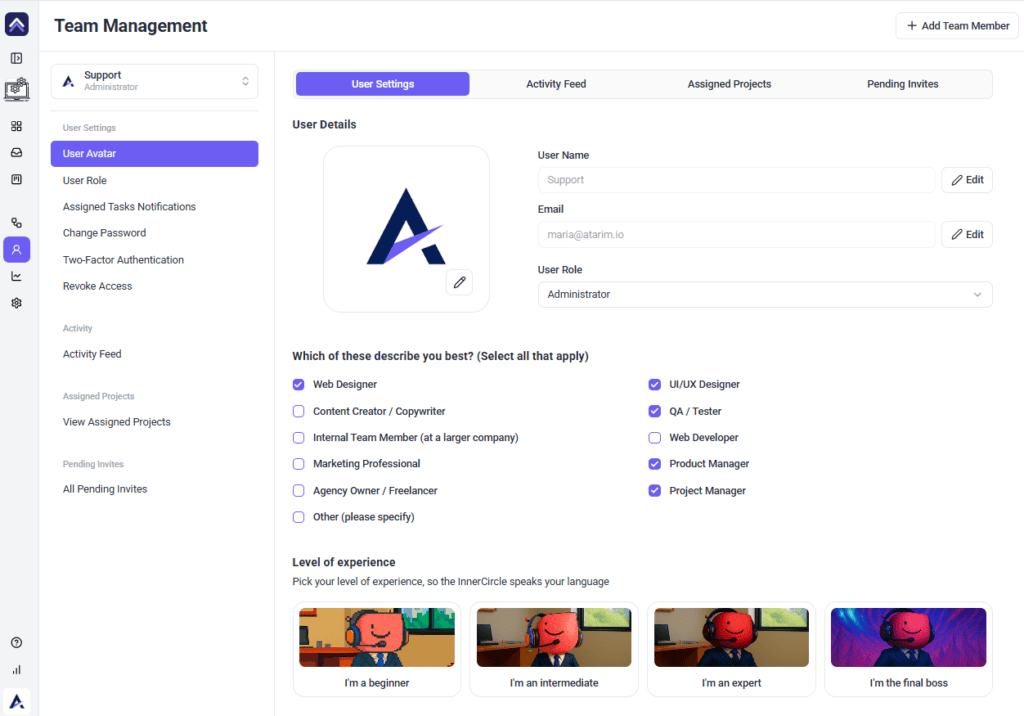
Everyone in the workspace, with their roles, access, and activity. Explore Managing Team Members & Collaborators, and for activity, Learn More About Activity Tracking and Reporting in Atarim
Step 7: Analytics
Workspace-wide metrics covering both human activity and how the AI layer is performing. Discover How to Track Performance with Analytics.

Step 8: Settings
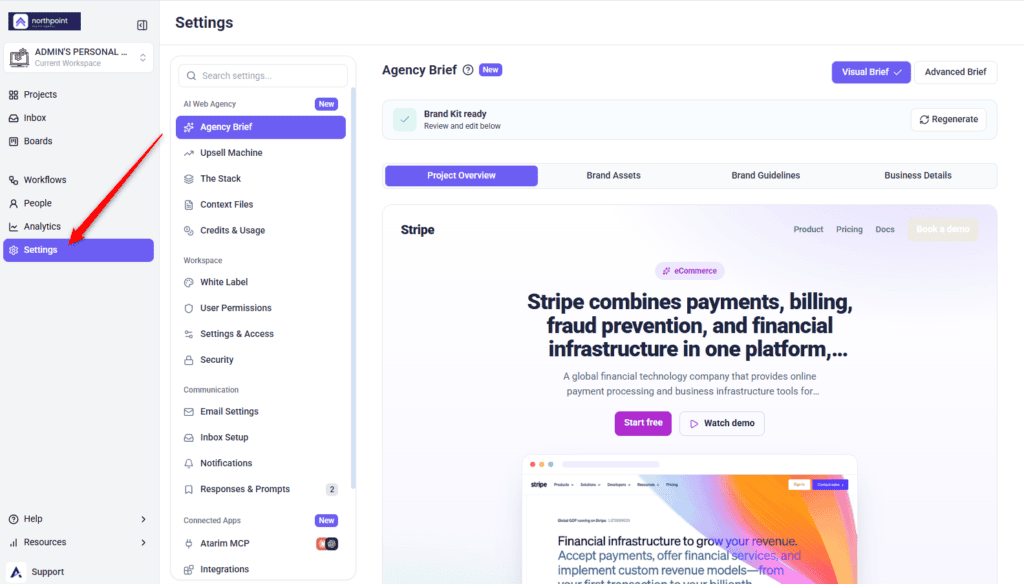
Everything that applies across the whole workspace, organised into five categories rather than one flat list. Managing Your Account Settings in Atarim
Step 9: Help, Resources, and Your Agency Identity
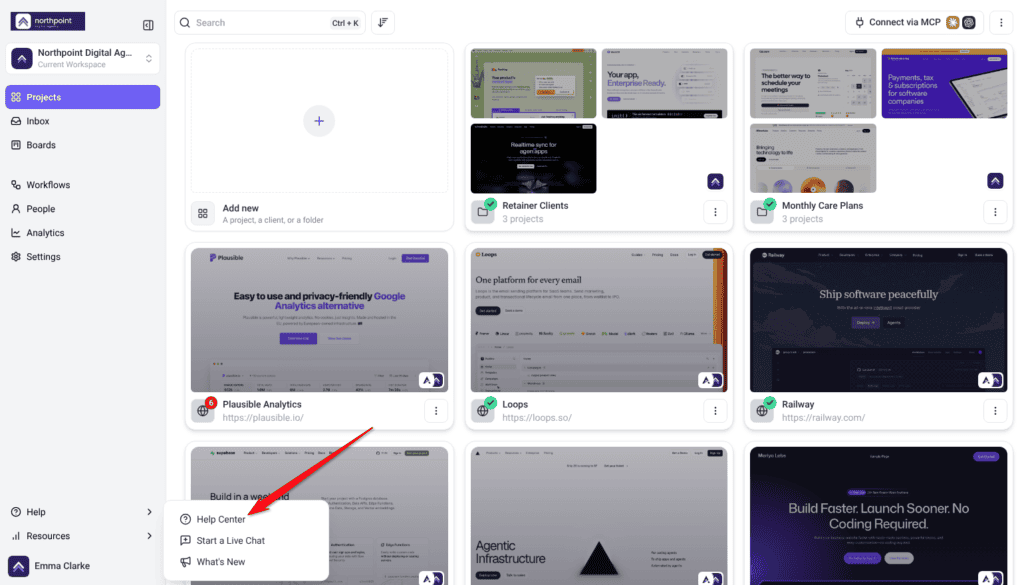
The bottom of the sidebar holds support links and your workspace’s branding.
Instructions:
- Select Help to reach the Help Center, or to start a live chat with support. Its What’s New option lists recent changes.
- Select Resources to see how much of your plan you’ve used: projects, team members, workspaces and AI credits. Increase Resources opens the upgrade options.
- Your agency’s identity sits at the very bottom of the panel — this is what white-labeled clients see in place of Atarim.
The How to Win Checklist
While you’re getting started, How to Win appears at the bottom of the sidebar, above Help, with a progress bar beside it. It opens a short checklist of the steps that get the most out of Atarim. It appears once you’ve completed the first item and goes away when every item is done. Owners and Administrators see it; Team Members and Collaborators don’t.
Instructions:
- Select How to Win at the bottom of the sidebar. With the sidebar collapsed, it’s the trophy icon labeled Tour Checklist.
- Pick an item in the list that opens and follow it.
- Watch the progress bar beside How to Win fill as you complete items.
Guided Tours and Tips
The first time you open some screens, such as Projects, Inbox, Boards, Workflows, a project dashboard and Collaborate, a short tour points out what matters there.
Instructions:
- Read the step, then select Next to move on, or Back to see the previous one.
- On the last step, select Done.
- To close the tour at any point, select Skip.
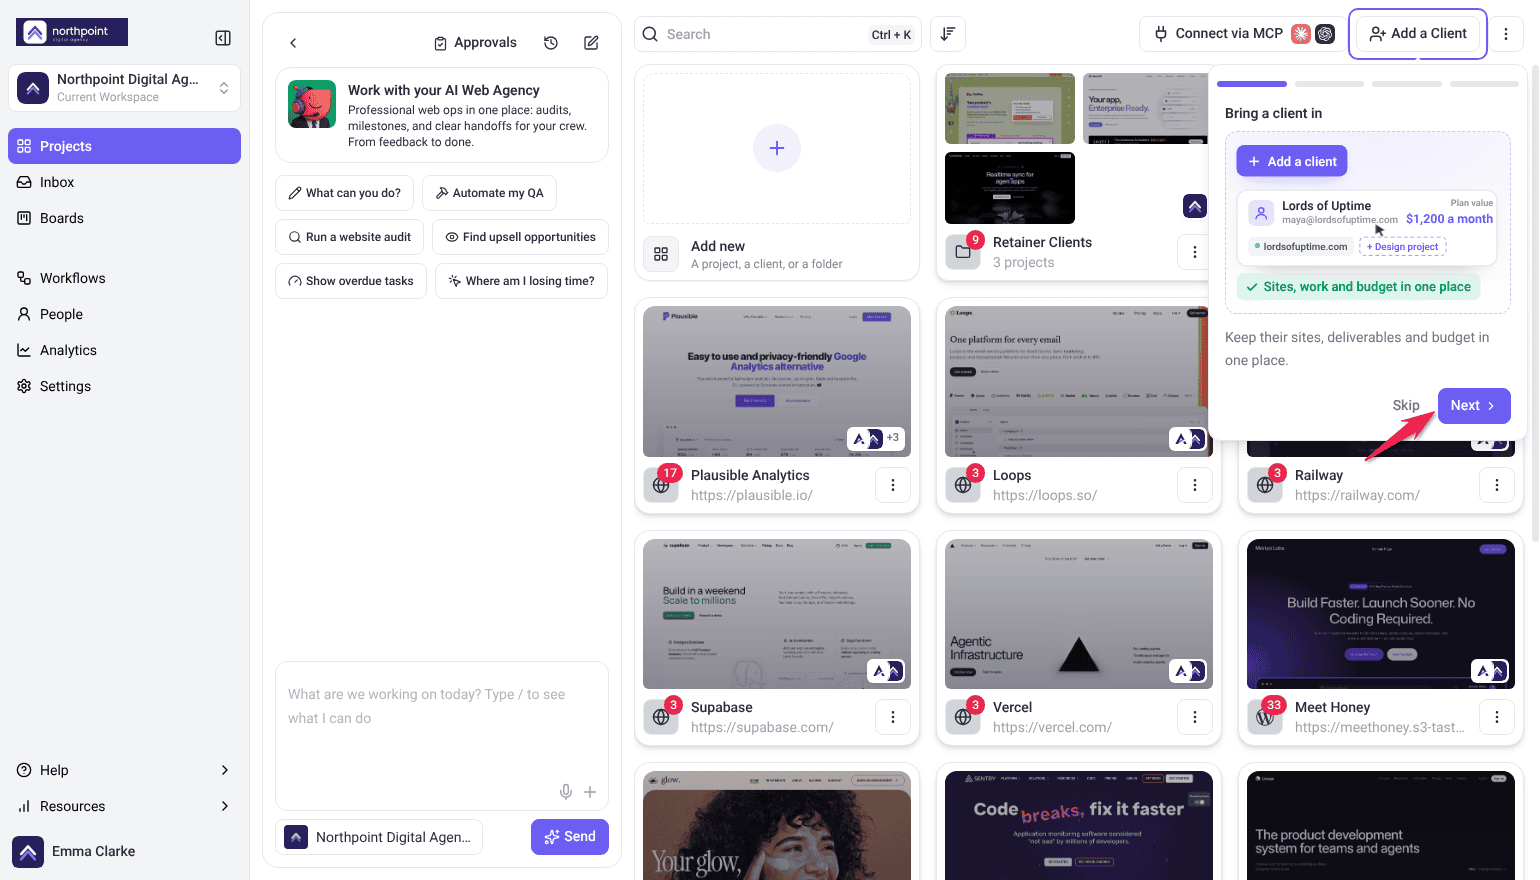
Each tour shows once. After Done or Skip, it does not open again on that screen. This follows your account, so it applies on every device you sign in on.
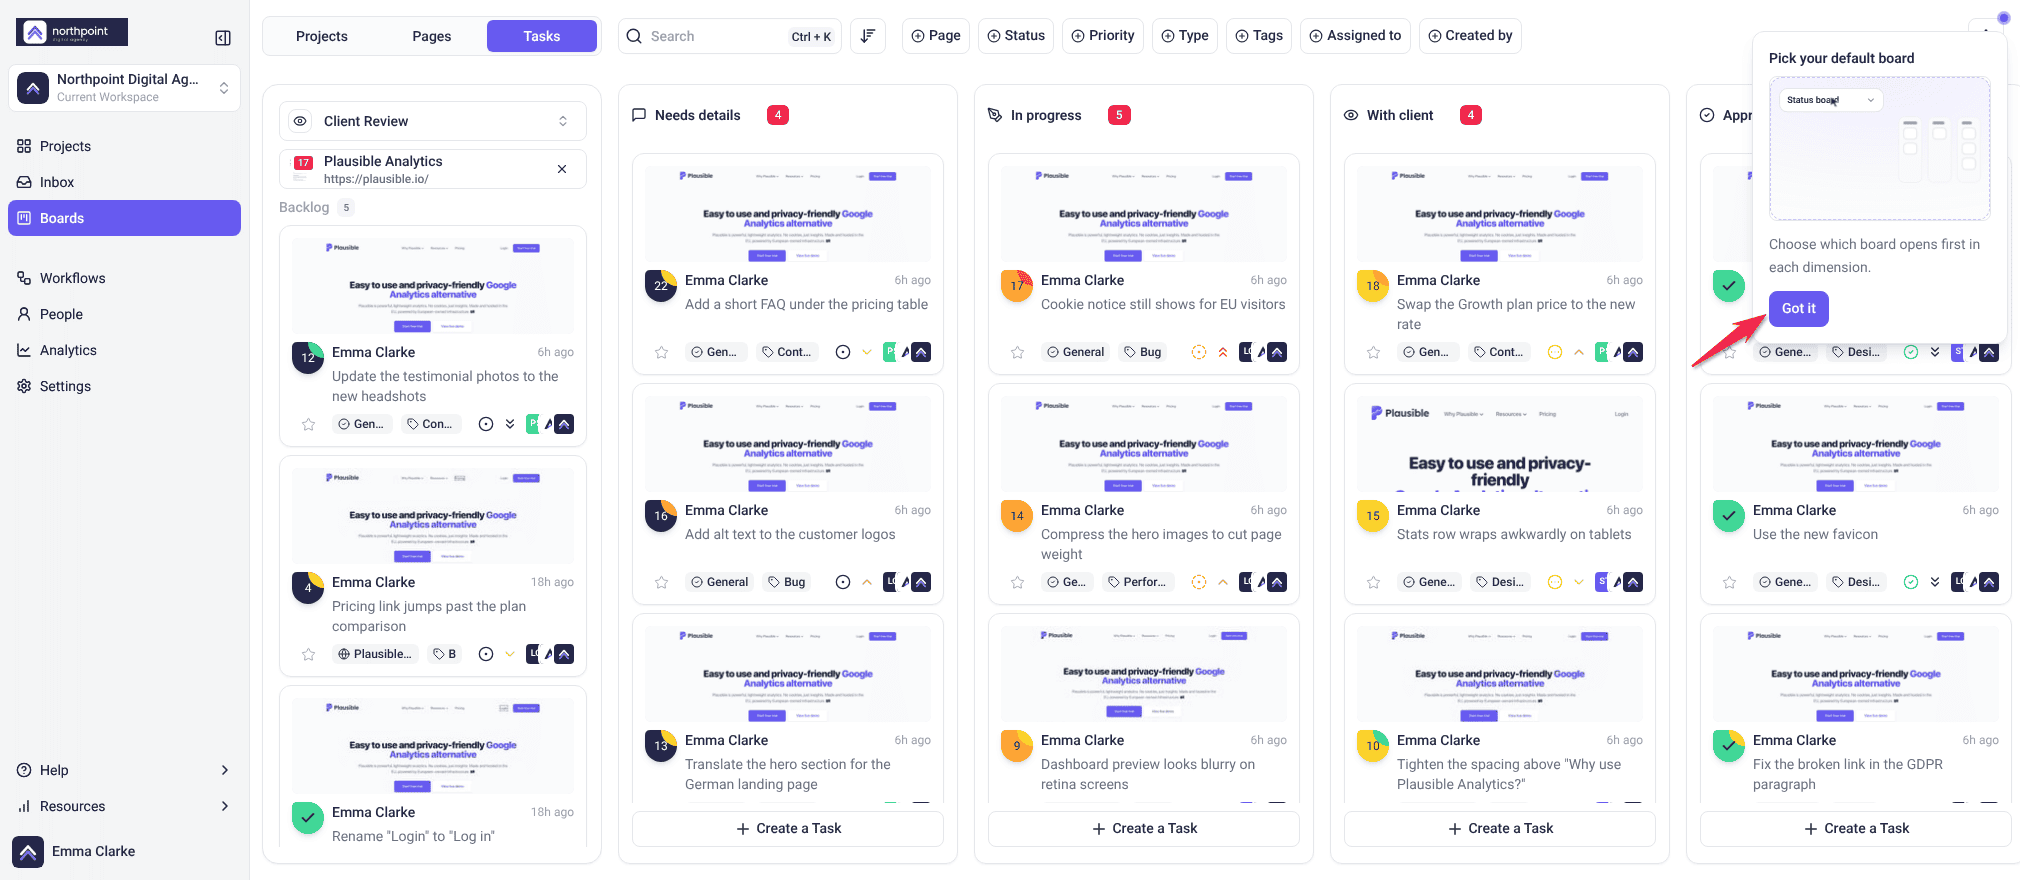
Small pulsing dots, called beacons, mark newer controls. Select a dot to read a short tip, then select Got it to close it for good.
FAQs
Where do I land when I log in?
Projects. If workspace chat (Beta) is enabled for your account, Claro’s chat panel sits on the left with your projects grid on the right; otherwise you’ll see the projects grid on its own.
How do I switch between workspaces I belong to?
Select the workspace name at the top of the sidebar and choose the one you want. The whole view reloads scoped to that workspace.
Why can’t I see the workspace switcher?
It only appears if you belong to more than one workspace, or if you have permission to view workspaces. With a single workspace there’s nothing to switch between.
Does switching workspaces filter my existing view?
No. Each workspace is a fully separate context — projects, team, and settings don’t carry across.
Why can’t I see People or Settings?
Both are restricted to the Owner and Administrators. They won’t appear in the sidebar for other roles at all.
A colleague mentioned a sidebar item I don’t have. Is something broken?
No. Items you don’t have access to are hidden rather than greyed out, so two people on the same workspace can see different sidebars depending on their role.
Where do I find my own profile?
Under People. Selecting Personal Settings in the Settings menu takes you there rather than opening a settings screen — it’s the only item in that menu that navigates away.
What happened to Forms and Time Entries?
Both are legacy features. They only appear on workspaces that still have legacy features enabled, so most sidebars won’t show them. If your team relies on either, speak to your administrator.
Conclusion
Projects is where you'll spend most of your time, but Inbox, Boards, Workflows, People, Analytics, and Settings are each one click away, and most have a dedicated article if you need the full depth.
The single most useful thing to internalise is that the sidebar is role-dependent. Items are hidden rather than disabled, so a sidebar that looks different from a colleague's is almost always a permissions difference — not a bug, and not something you've broken.
Tips & best practices
- Use the quick-start prompts on Projects as a daily habit, not just a first-login curiosity
- Check tags first when triaging a busy board — they surface client-initiated work fastest
- Learn the five Settings category names so you're not hunting for a setting every time
- Set up Inbox Setup and Email Settings before your first client invite; both apply only to mail sent afterwards
- Pull an Analytics summary before renewal conversations to make ongoing work visible
- If something's missing from your sidebar, check your permissions before assuming it's broken