Asana
Push client feedback from Atarim into the Asana project and section your team already works from.
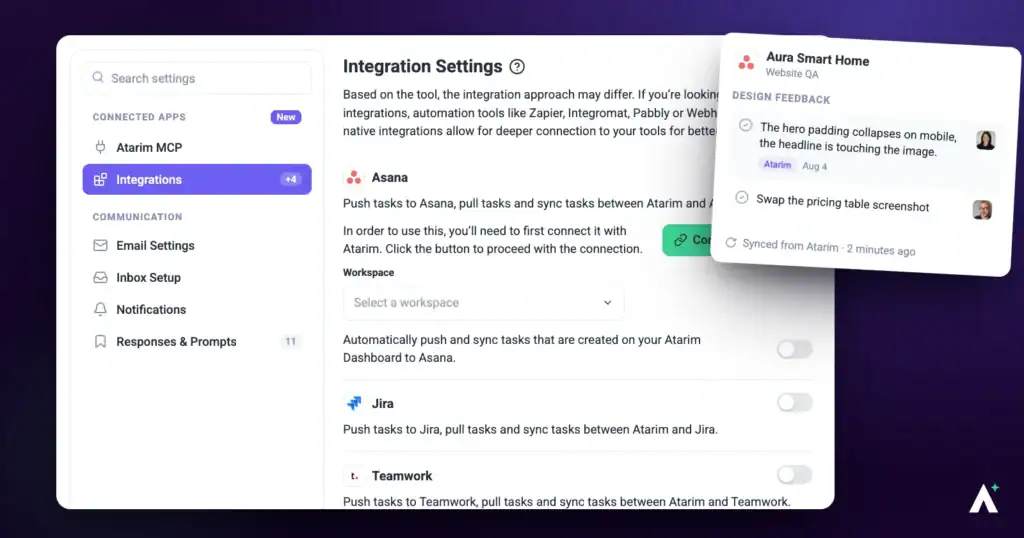
Client feedback captured visually in Atarim becomes an Asana task in the section your team already works from. Asana has more levels than most tools, and the integration follows all of them — so setup asks for four choices rather than one.
The Asana integration pushes tasks from Atarim into Asana and keeps them in step afterwards.
Connect Asana
The connection belongs to the Atarim workspace you are in. If you use more than one workspace, connect Asana in each one. The Asana workspace, team, project and section your tasks go to are chosen separately, below.
Instructions:
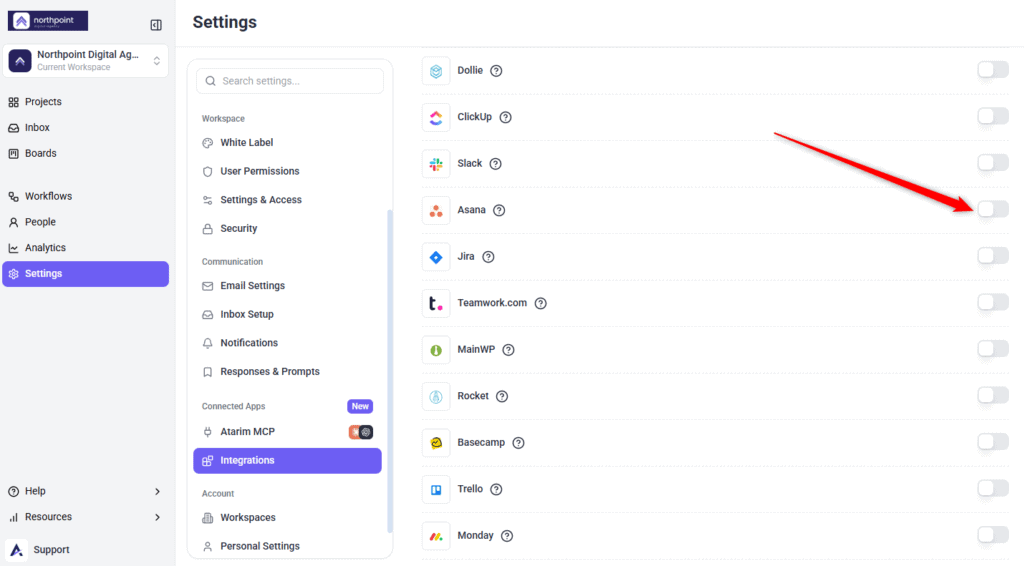
- In Atarim, go to Settings.
- Under Connected Apps, select Integrations.
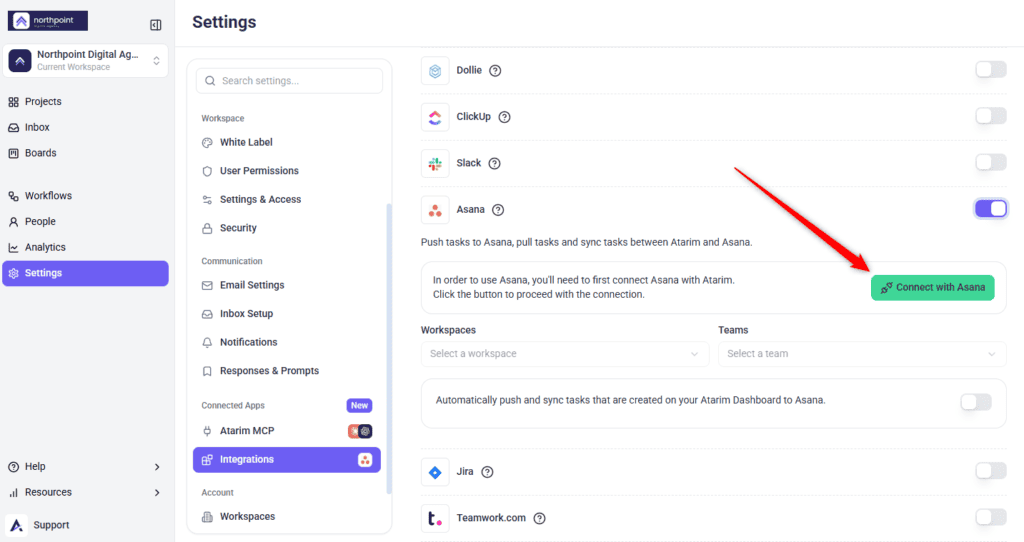
- Find Asana. Before it is connected, the panel explains that you need to connect Asana first and to use the button to proceed.
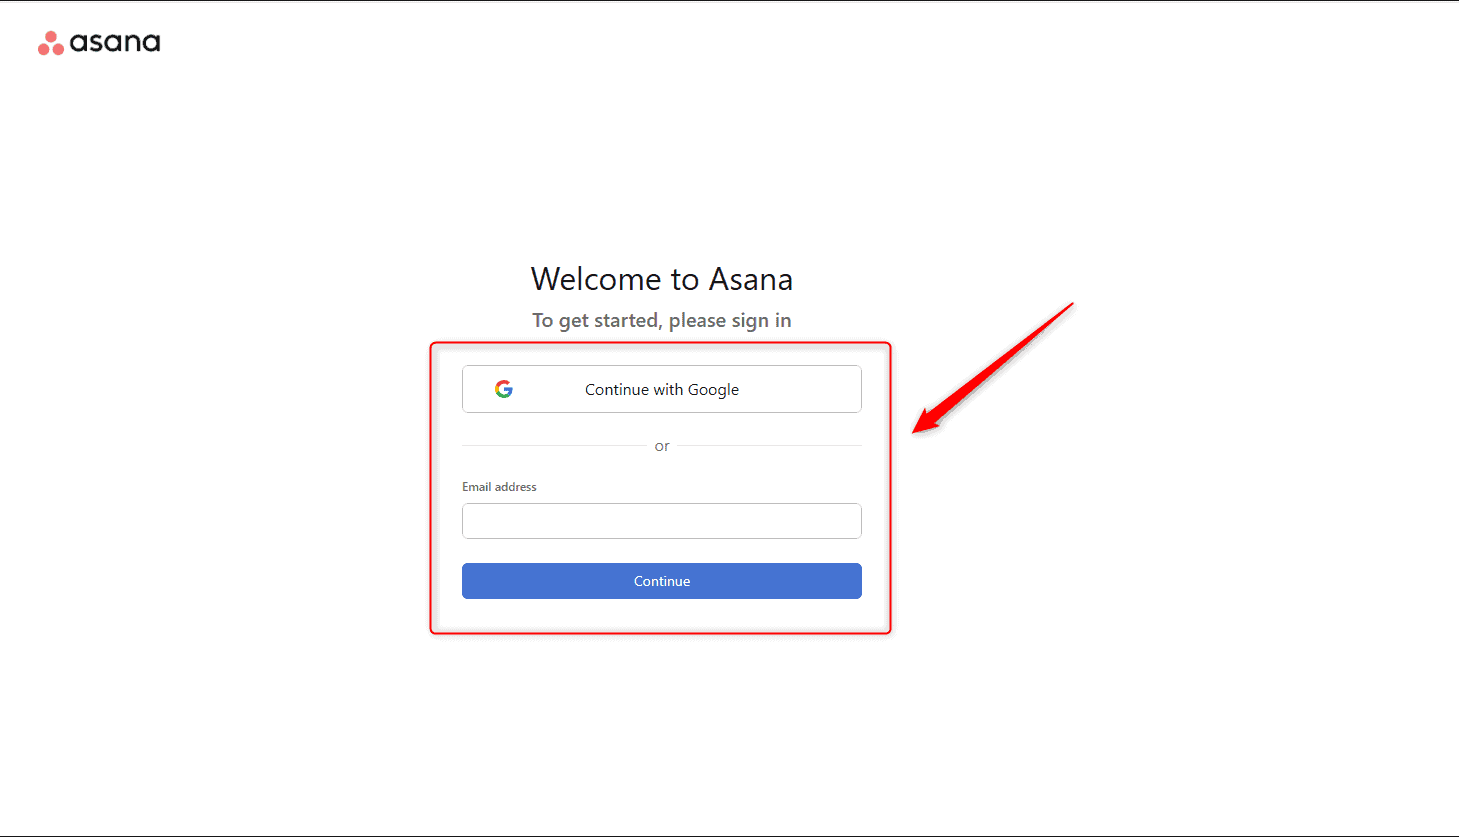
- Switch the toggle on, then select Connect with Asana. Asana opens its login and permission screens — sign in if prompted.
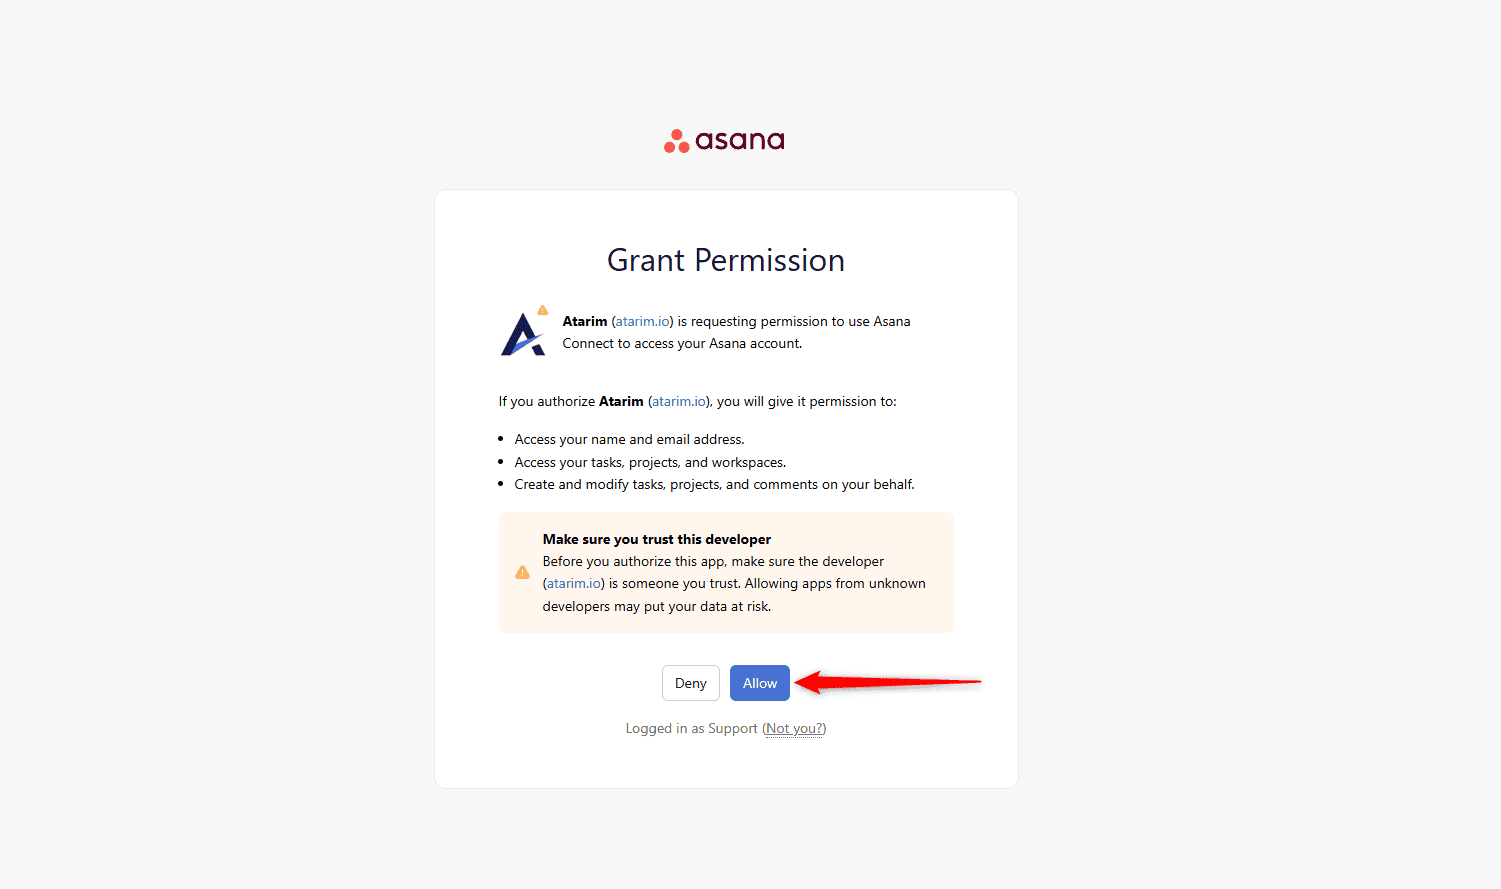
- Select Allow to grant Atarim access to your Asana workspace. You are returned to Atarim with a confirmation, and the selectors become available.

Choose the Destination
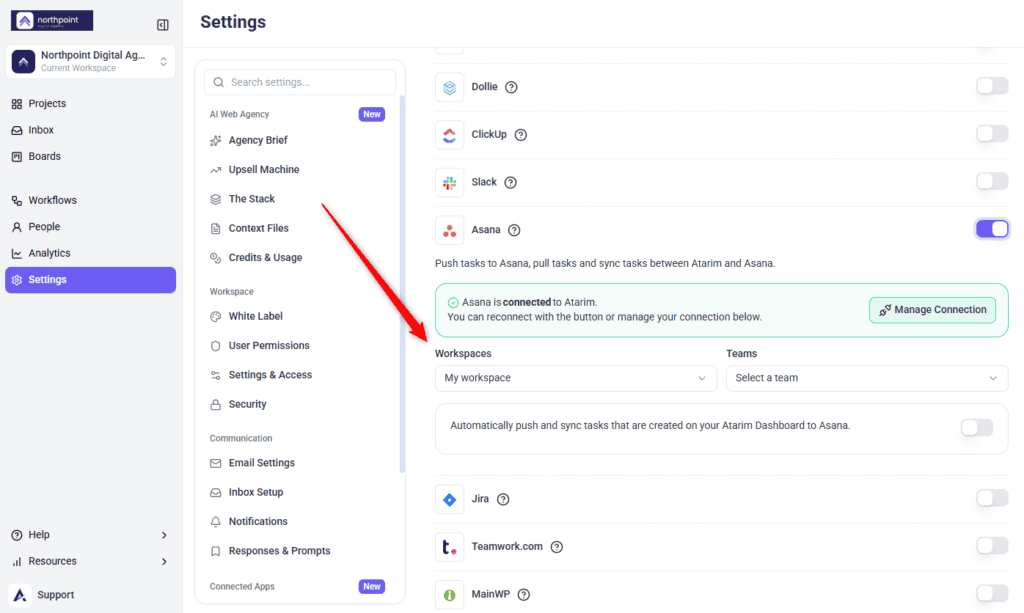
Four selectors narrow down exactly where tasks land, each populated by the choice above it.
| Selector | What it picks |
|---|---|
| Workspaces | The Asana workspace or organisation. |
| Teams | The team within that workspace. |
| Project | The project within that team. |
| Section | The section tasks are actually created in. |
Nothing syncs until all four are set.
Instructions:
- Open Workspaces, which shows Select a workspace, and choose one.
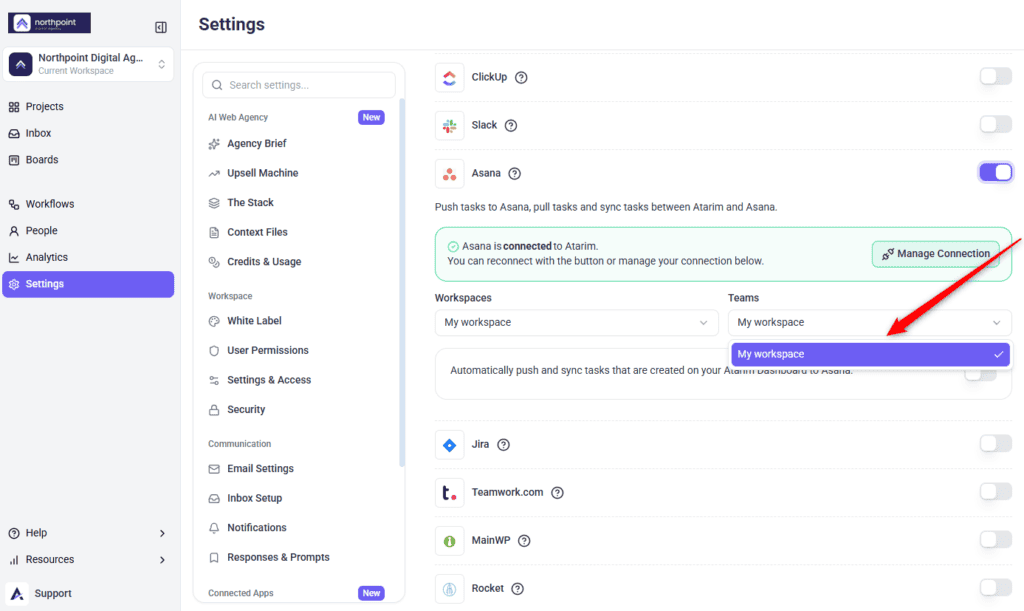
- Open Teams, which shows Select a team, and choose one.
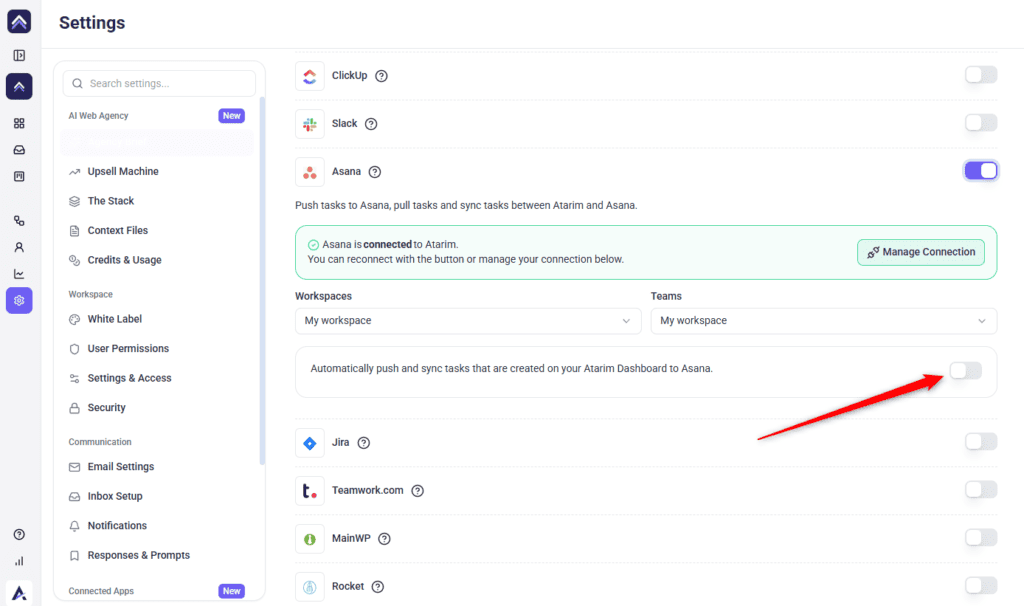
- Switch on the option to automatically push and sync tasks created on your Atarim dashboard to Asana.
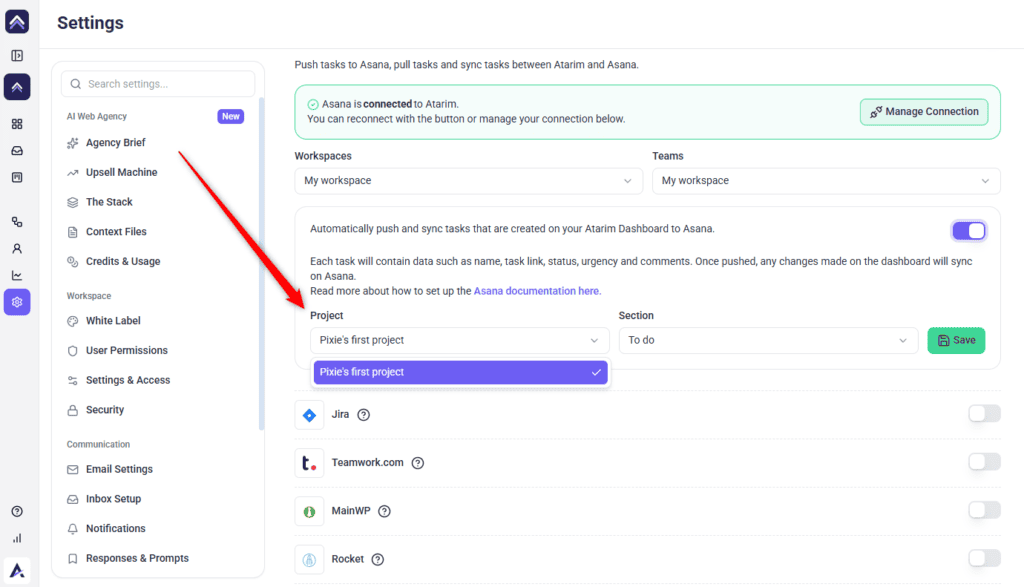
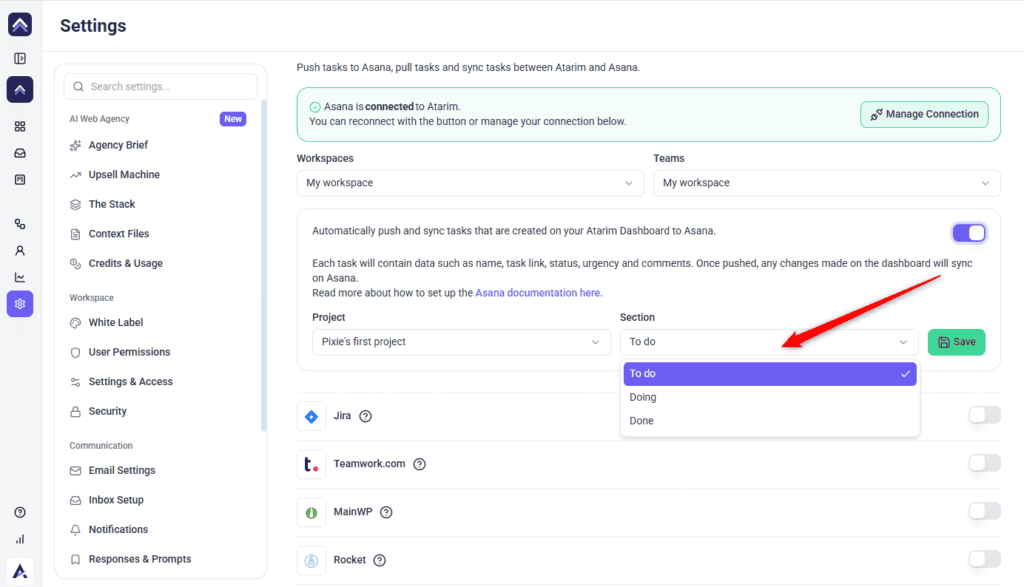
- Choose the Project, then the Section. Each list only populates once the level above it has been chosen.
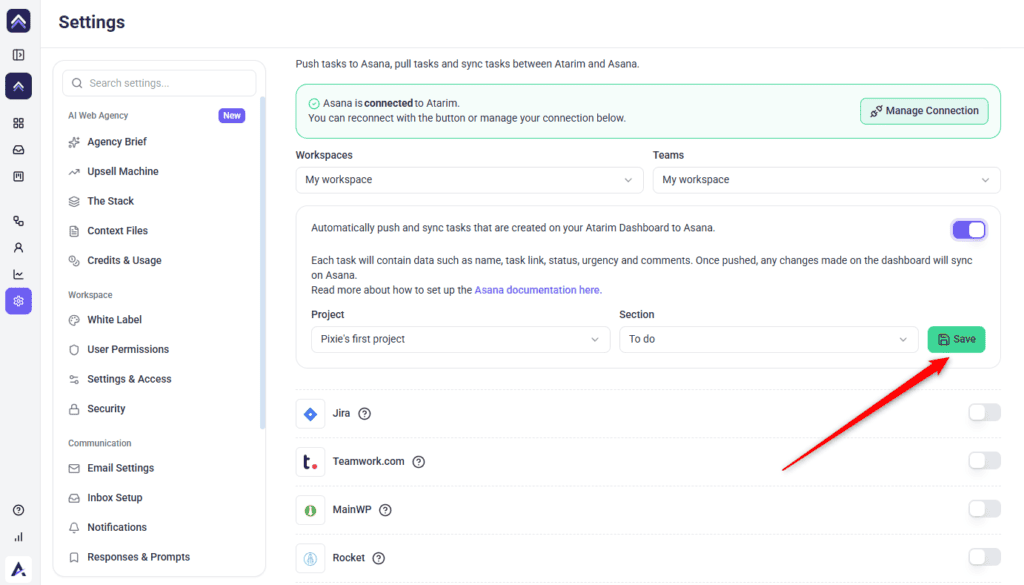
- Select Save. Tasks now push to that section.
What Gets Pushed
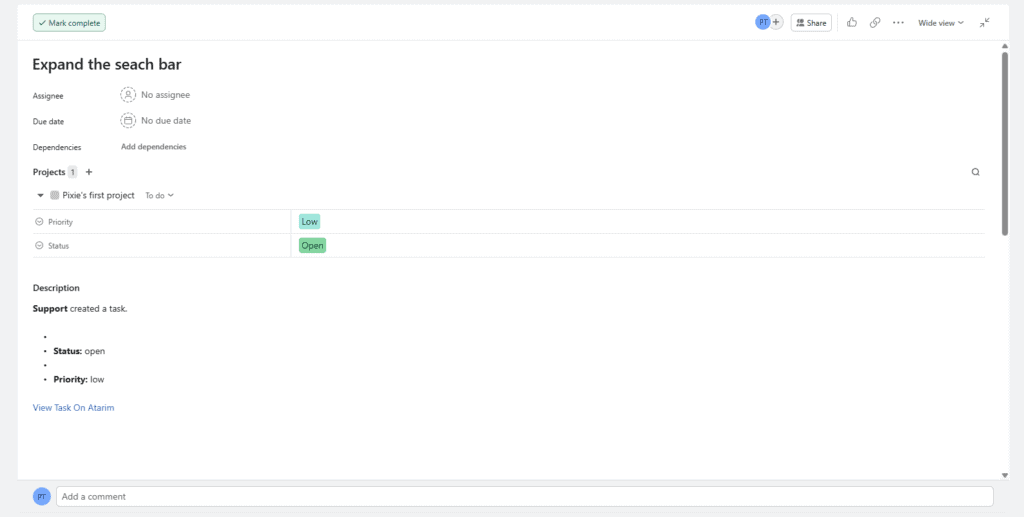
Each task pushed to Asana carries its name, a link back to the task, its status, urgency and comments — so the Asana task is useful on arrival rather than a bare title. After the initial push, changes made on the Atarim dashboard continue syncing to Asana.
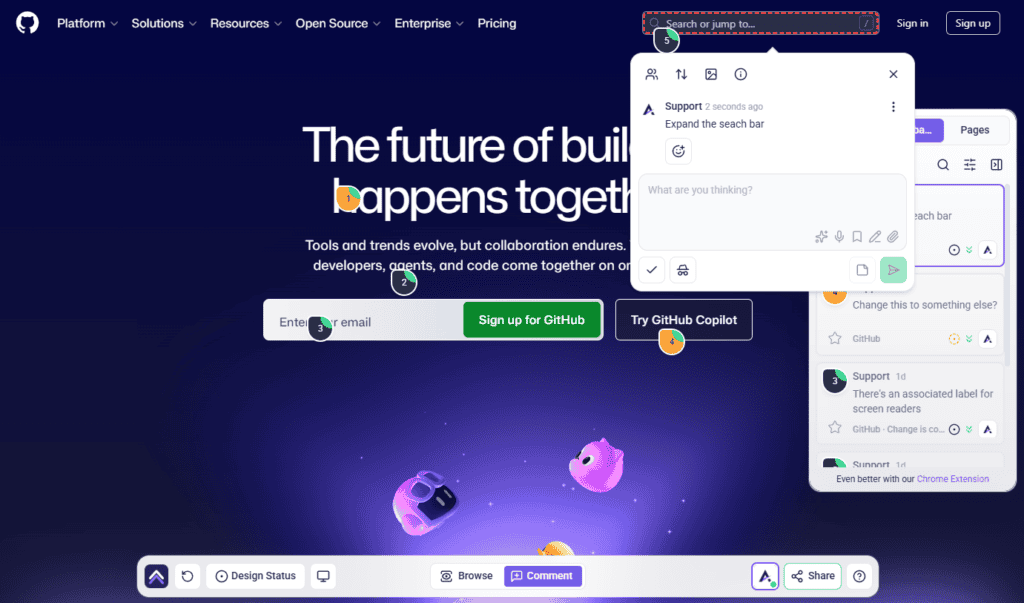
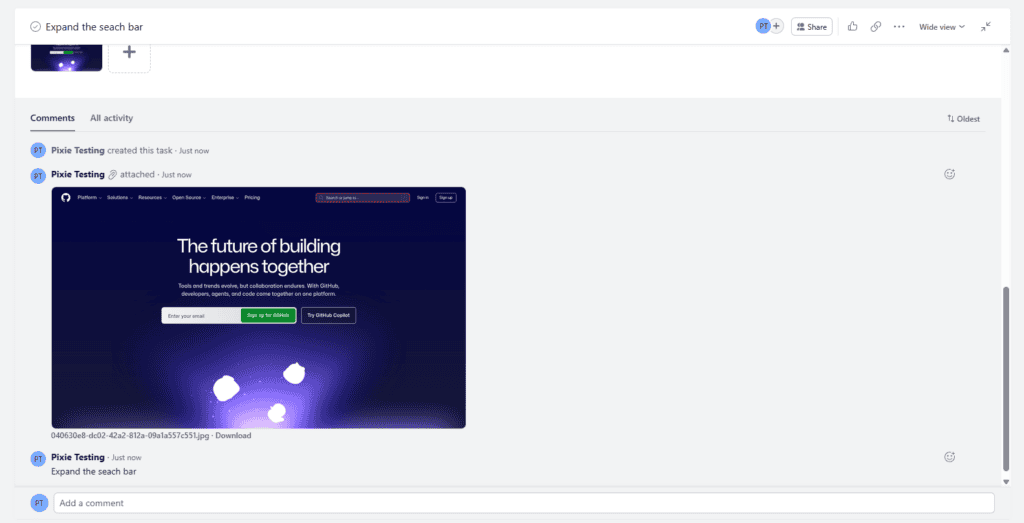
Because tasks created visually in Atarim already capture the page they came from, that context travels with them. A developer opening the Asana task can see what was being looked at without asking.
To bring existing Asana tasks into Atarim, use Import Tasks in the More Actions menu of the Inbox or Boards, as described in Importing tasks.
Using Asana in a Workflow
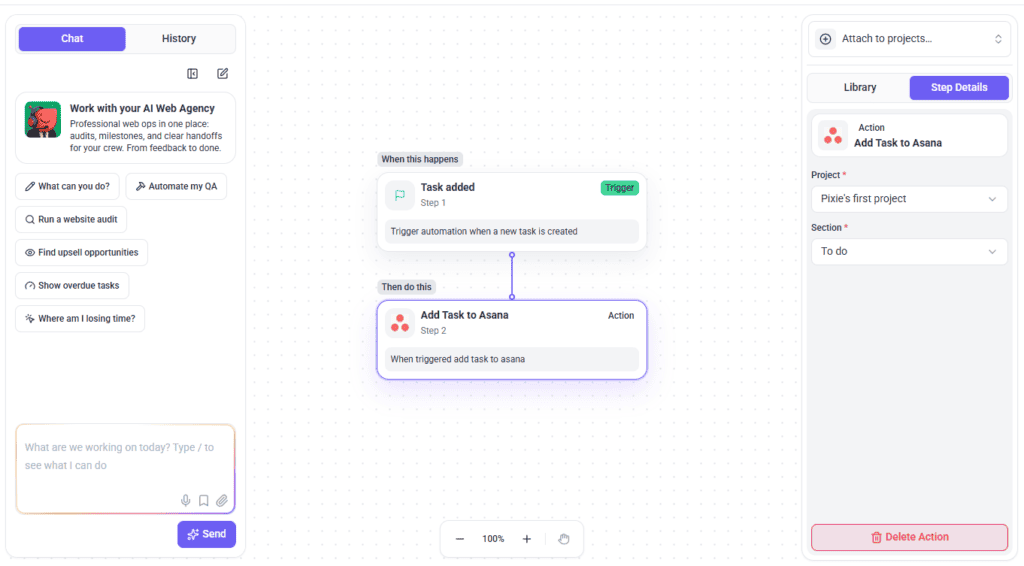
The setup above pushes everything automatically. If you would rather be selective, Asana is also available as an action inside Workflows, so only tasks meeting your conditions get pushed.
Instructions:
- Create or edit a workflow.
- Add the Add Task to Asana action, listed under Integrations.
- Choose the Project and Section the task should be created in.
- Save the workflow.
Test the Integration
A test task is the fastest way to confirm all four selectors point where you think they do.
Instructions:
- Create a task in Atarim on one of your projects.
- Open the Asana project and section you configured.
- Confirm the task appears with the details you expect. If it does not, check all four selectors are saved and automatic syncing is on before looking anywhere else.
Setup at a Glance
| Step | Where it happens | What it needs |
|---|---|---|
| Switch Asana on | Atarim → Integrations | A plan that includes it, and permission to manage integrations. |
| Authorise Atarim | Asana | Enough access in Asana to approve an app. |
| Choose Workspace | Atarim | A live connection. |
| Choose Team | Atarim | A workspace selected. |
| Turn on automatic syncing | Atarim | A team selected. |
| Choose Project | Atarim | A project existing in that team. |
| Choose Section | Atarim | A section existing in that project. |
| Save | Atarim | All four levels chosen. |
Benefits
| Benefit | In practice |
|---|---|
| Feedback reaches the right section | Four levels of targeting mean tasks land where they belong, not in a general inbox. |
| Context travels with the task | Asana tasks arrive with the name, link, status, urgency and comments. |
| Changes keep flowing | Dashboard changes continue syncing after the initial push. |
| No manual copying | Nobody transcribes requests between systems. |
| Clients stay in Atarim | They never need an Asana seat for their feedback to be tracked. |
Example Use Cases
| Situation | How to set it up |
|---|---|
| Your team plans delivery in Asana | Push into the project’s intake section so requests enter the plan automatically. |
| Client feedback mixed with internal work | Create a dedicated section for client requests and point the sync there. |
| Only some requests belong in Asana | Use a workflow with conditions instead of automatic syncing. |
| Clients giving visual feedback | Let them work in Atarim while tasks appear in Asana. |
| Several teams in one workspace | Choose the team that owns the work — the project list narrows to it. |
FAQs
Why are there four selectors?
They follow Asana’s own structure — workspace, team, project and section — so tasks land in a specific section rather than somewhere general.
Do I need to create the project and section first?
Yes. Atarim can only choose from what already exists in your connected Asana account.
Why is a dropdown empty?
Either the level above has not been chosen, or nothing exists at that level in Asana. The panel tells you which.
What travels across with a task?
The task name, a link back to it, its status, urgency and comments. Later dashboard changes continue syncing.
Can I send only some tasks to Asana?
Yes. Use the Add Task to Asana action inside a workflow instead of automatic syncing.
Do clients need an Asana account?
No. Clients work in Atarim; syncing happens between your two accounts.
Can I use this across several Asana projects at once?
Not simultaneously. The integration links to a single Asana project per workspace. You can change which one at any time, and a workflow gives you finer control if you need tasks going to more than one place.
Can I change the destination later?
Yes. Change the selectors and select Save again.
What happens if I switch Asana off?
New tasks and comments stop going to Asana. Tasks already in Asana stay where they are. To switch it off, go to Settings → Connected Apps → Integrations and turn off the Asana toggle.
Common issues
- A selector is empty or greyed out — the level above has not been chosen. Work down Workspace, Team, Project, Section in order.
- A list prompts you to create something — that level does not exist yet in Asana. Create the project or section there, then reopen the selector.
- The Asana option is locked — your plan does not include native integrations. The lock names the minimum plan required.
- Integrations is not in your settings sidebar — your role does not have access. Ask an Administrator.
- Tasks are not reaching Asana — confirm all four levels are chosen, automatic syncing is on, and you selected Save.
- Tasks landed in the wrong section — the saved destination points elsewhere. Change the selectors and save again.
- Tasks are being created twice — automatic syncing and a workflow are both pushing. Use one or the other.
- Asana is not in the workflow action list — connect the integration first, then reopen the workflow builder.
- Your workspace is not listed — check you authorised the right Asana account, then reconnect so the list refreshes.
Conclusion
Asana asks for more setup than most integrations because it targets more precisely. Connect the account, then work down Workspace, Team, Project and Section in order, and save.
The choice worth thinking about is the destination section — syncing runs continuously, so an intake section is easier to triage than one your team is actively working.
Tips & best practices
- Create the project and section in Asana before you start.
- Work down the four selectors in order — each depends on the one above.
- Connect with a shared or admin account rather than a personal one.
- Use an intake section rather than an active one.
- Select Save once all four levels are chosen.
- Test with one task before relying on the integration.
- Choose either automatic syncing or a workflow, not both.
- Use tags on tasks to drive workflows — routing bugs, client feedback or urgent work to different destinations.
- Chain workflow steps: task created pushes to Asana, task tagged assigns it, status change moves it on.